


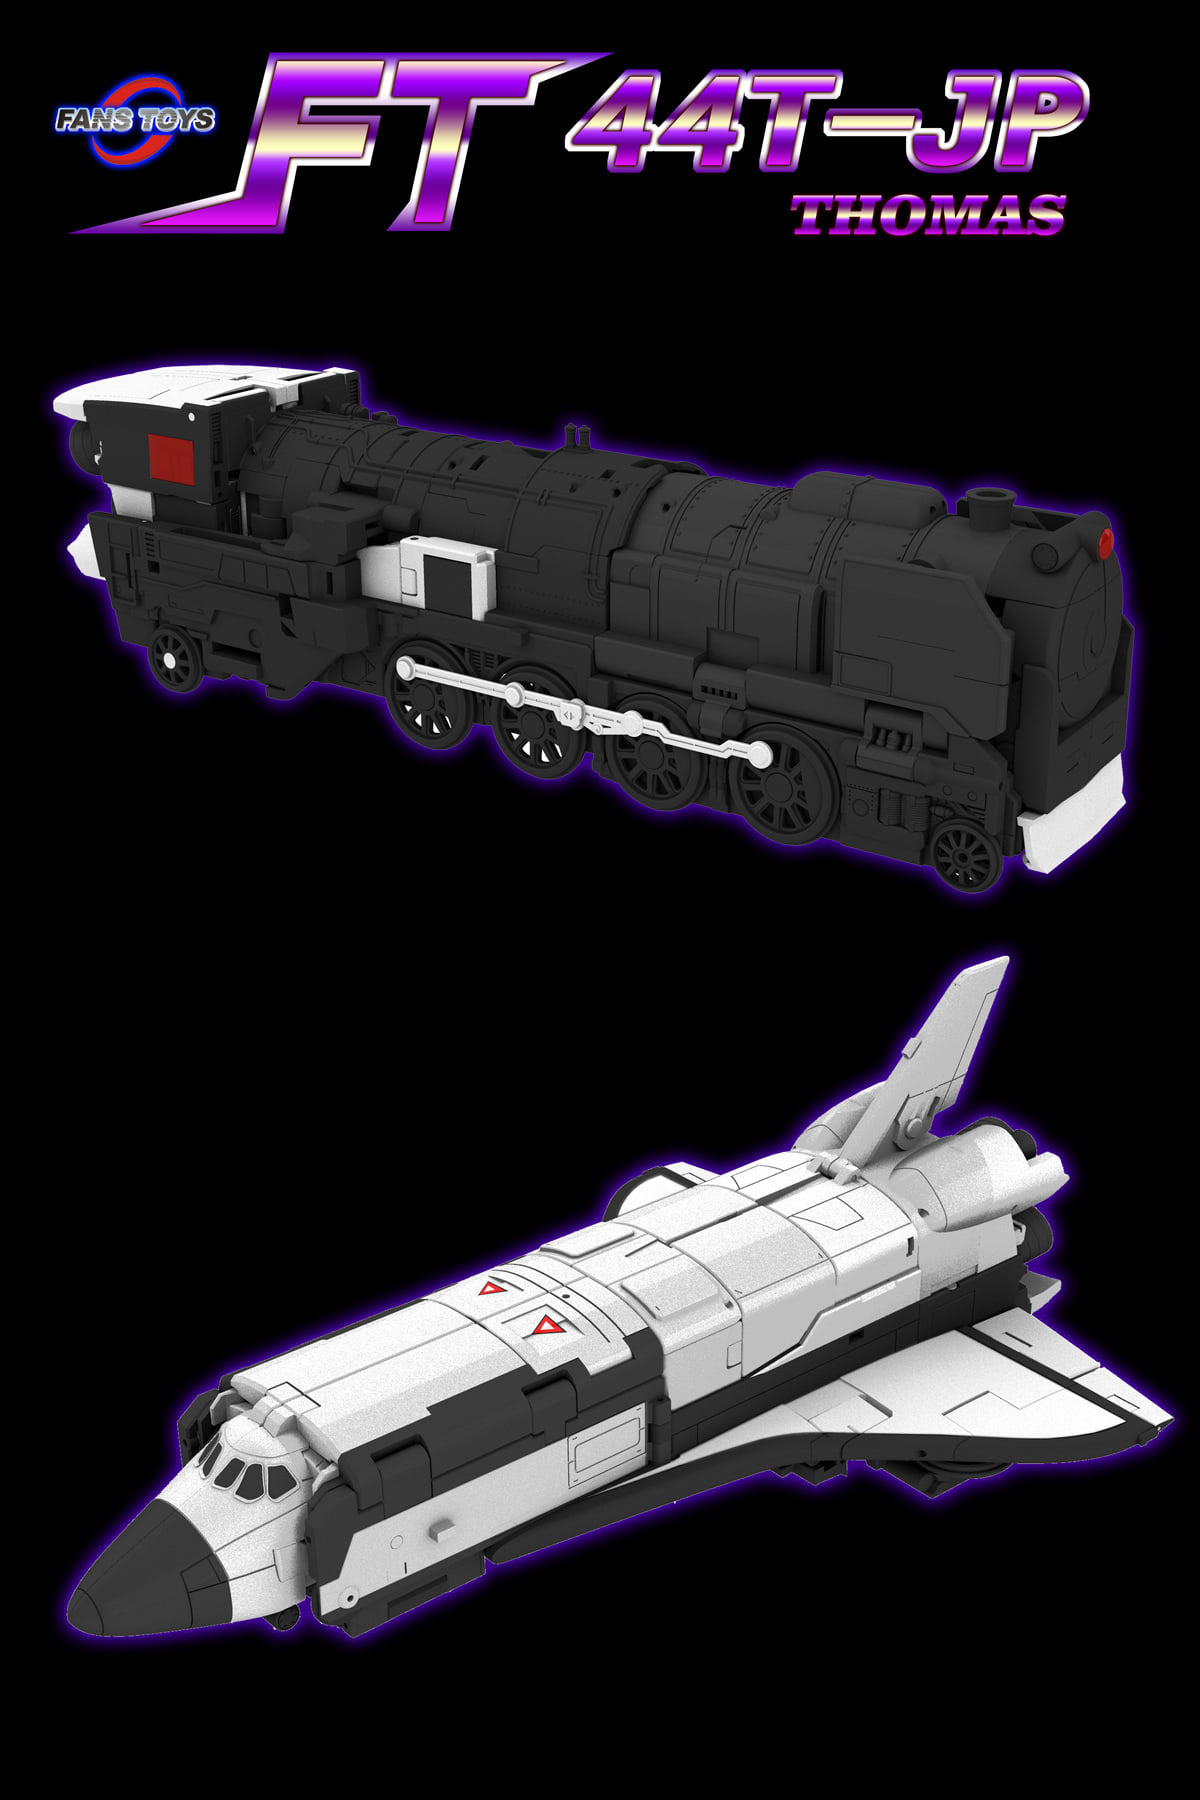
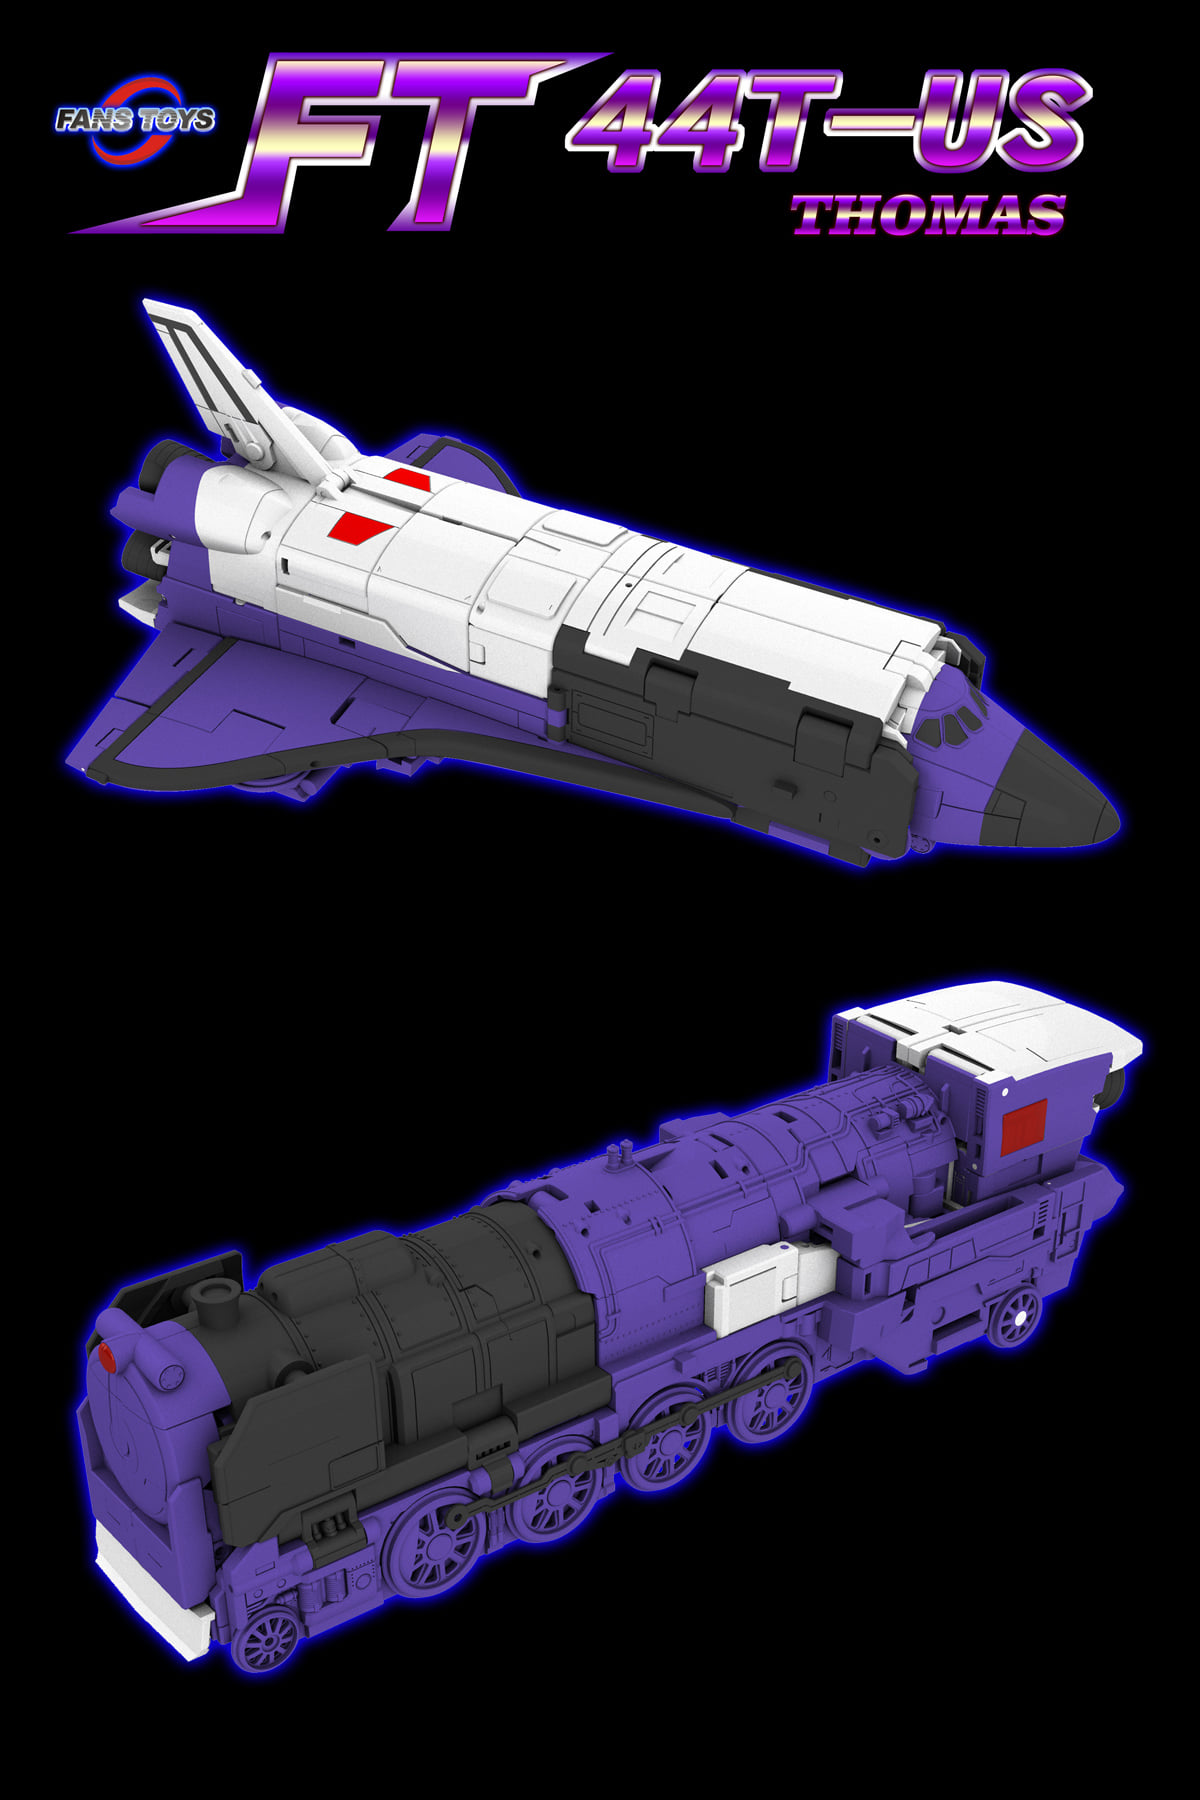
Fans Toys have shared images of two new redecos of their FT-44 Thomas / Masterpiece Astrotrain.
The images show FT-44JP Thomas with colors inspired by the Takara G1 Astrotrain toy (black train and white space shuttle) and FT-44US Thomas featuring a deco based on Hasbro G1 Astrotrain toy (purple train and white and purple space shuttle).
Two alternatives for fans who are looking for an Astrotrain’s toy deco figure for the Masterpiece scale. See all the mirrored images attached to this news post and then share your impressions on the 2005 Boards!


4249david
You need a setting solution for waterslides, and ideally a softener too.
Khelthorn
I used stickers I got from toyhax.
Blue Prime
What did y’all used for insignia/decal for Thomas? I’ve been trying to use a waterslide decal, but I’m having a hard time. It doesn’t seem to stick very well and it peels off quickly.
Khelthorn
Well, I transformed him again today and figured out what is keeping the top of the train from lining up properly.
View attachment 30331366
There are two pieces go two low and bump in to the legs. Circled in red below and the spots on the legs that it bumps in to is circled in green.
View attachment 30331378 View attachment 30331379
You can even see where it has marked the legs slightly in this picture.
View attachment 30331381 View attachment 30331382
I am seriously considering filing them down a little bit so that it sits flush. Part of me feels like I am missing something somewhere, but I have gone over it and over it and simply can't see it going any other way, it just looks like there is slightly too much plastic there is all. Anyone able to check this out and compare for me?
Also, in response to someone asking about any potential paint issues, etc, the only one I have noticed in my own is from the front of the train, pictured and circled below.
View attachment 30331385
Heatwaves
Got an original release thomas (g1 toon) with the track I am looking to sell. Decided I like the US color more. Never transformed him and was one display sparingly. Shoot me a message!
ARedmond
I may be slightly late to point this out, but watch out for the little folding triangular tips on the wings when you're folding the wings under for train mode. If you have them misaligned, they rub against the chest pieces, and can scuff the paint. I received a purple paint mark on my US toy version's chest due to my impatience with that step.
Khelthorn
The only issues I have ever had were a problem getting the backpack in place once and every time I put him as a train, the top doesn't sit totally flush. People have said I don't have the legs aligned right but I have looked and transformed multiple times and can't get it any other way.
Aside from that, he is the most solid figure I own. Extremely well designed.
mx-01 archon
Yeah, first run used a long screw where you're seeing a pin there. It was slightly annoying, because the screw threads could catch and prevent the piece from sliding cleanly. The new pin they're using instead might be slightly tight. If repeat transformations don't loosen it up a bit, you could try lubricating the joint for ease-of-use.
octobotimus
Gave it a solid squeeze and it went in. Looking at vids, the original had screws instead of a pin, so maybe it’s a re-issue thing where it’s insanely tight to push them in now due to alignment or paint or something.
BIOMEC
Even If you rotate the piece on the pin axis? The upper panels also shift upward to accommodate those chest pieces
octobotimus
Weird thing I’m encountering, the chest pieces that come down and cover the abdomen won’t close for shuttle mode. Looking up vids they should apparently have 0 resistance yet these won’t close. And everything looks the same minus the screws being swapped for pins.
like it almost feels misaligned even though nothing seems to be on the wrong side or misassembled. Those skewed square pegs for some reason don’t line up with the holes they go into towards the bottom of his waist.
View attachment 30329023
BIOMEC
Just be careful and you will be fine
Turingmachine1975
The tricky parts to get into proper position for both alt modes are the knee joints and the butt flap. Getting the bot’s backpack into place is also a bit of a chore.
Overall it’s a very intuitive and straightforward transformation . . . not at all ‘difficult’.
octobotimus
Dang, 50 transformations to get one chip is honestly rather impressive (even if it sounds like it’s in a rather unfortunate location).
Welp you’ve given me the confidence to go in using their instructions") .
.
mx-01 archon
Mine has an annoying chip right on his crotch, after like 50 transformations. That's about the only thing I've ever had issue with on him.
There was that one potential QC issue of the toy having the wrong knee pieces installed, so the leg ratchets don't line up quite right. If that happens, hopefully it's just a matter of L and R being swapped, and not two of the same. I don't know if that's been a problem that's persisted with the later runs.
octobotimus
Just watch out to not scrape stuff, or is it a “don’t transform it” kind of thing?
BIOMEC
Paint chipping!
octobotimus
So, anything in particular to watch out for with Thomas? Parts to watch out for, paint, stuff During transformation, using instructions/vid, etc?
Saw Thew used just the instruction to transform it and honestly kinda want to try that. Usually use vids, but if even thew could do it…")
boomerdave
I gotcha. I misread that")
Callahan
That's understandable – I really should of done that with Terminus Hips too –
I meant more like being overly nice in the hope to get complete products –